
DIY Tassel Garland

One thing you really need to know about me is that I am a craft supply frrrreak. Like, totally-strung-out-on-paper-pens-washi-tape-anything-crafty-I-can-get-my-paws-on art supplies junkie. I'm the weirdo that jumps for joy when the Target school supply section pops up. Although, I sort of have a love-hate relationship with its reappearance each year. It always slightly bums me out when I turn the corner in mid-July and there it is, like a black cloud hanging over Summer, a reminder that the season will end, and always too soon. But I do loooove perusing all the new goods. And no, I'm not in school. I need no supplies. But that doesn't stop me. I need all the paper. All the pens. All the supplies! And I could go broke at Paper Source. Any fellow paper and craft supply freaks out there?
So, when tassel garlands started to gain popularity a couple years ago, naturally I was instantly drawn to them. So pretty and fun and colorful. But, whoa! can they get pricy! So, I was determined to make my own. It's actually pretty simple, but it does take some time. This is the perfect, mindless activity to do when you want to zone out for a while or if you happen to be binge-watching something on Netflix. Ahem. Stranger Things, anyone? (I'm already re-watching it for the second time...) What's that? Oh, you don't binge watch shows on Netflix? Ya, me neither...
DIY Tassel Garland
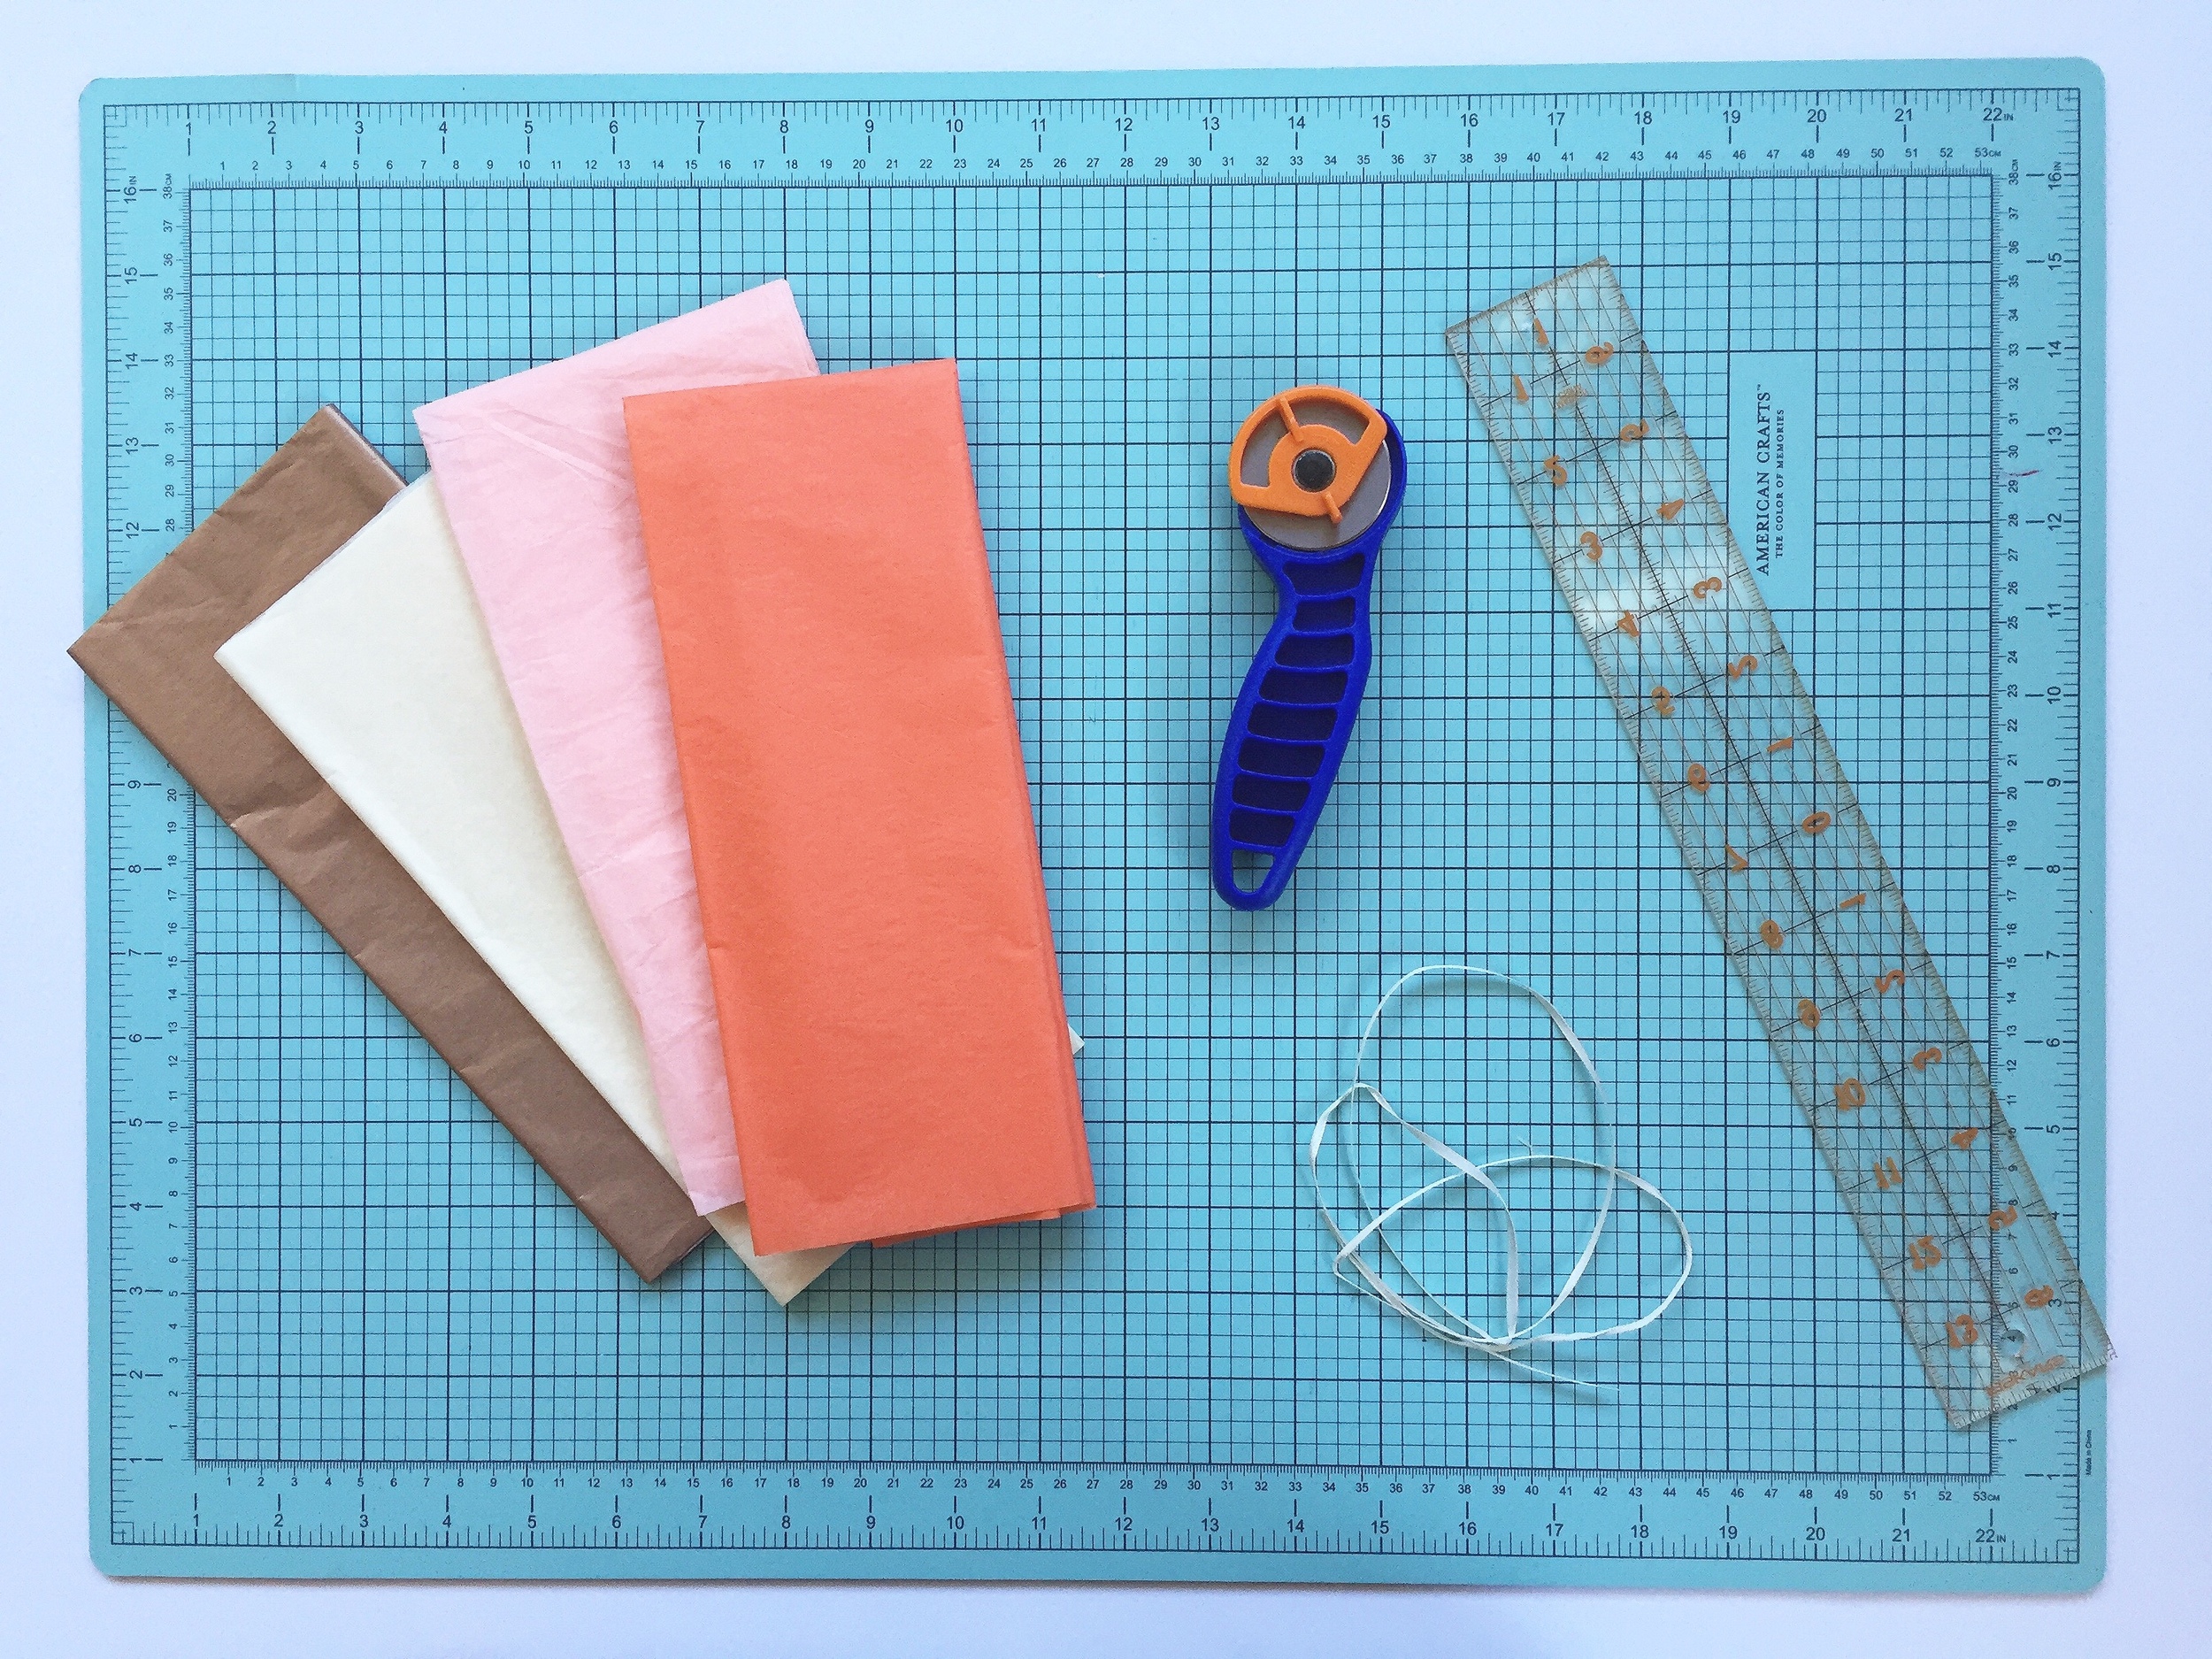
various colored tissue paper
various colored mylar or metallic tissue
rotary cutter* (see note)
cutting mat
ruler
ribbon of choice
transparent tape, if using mylar
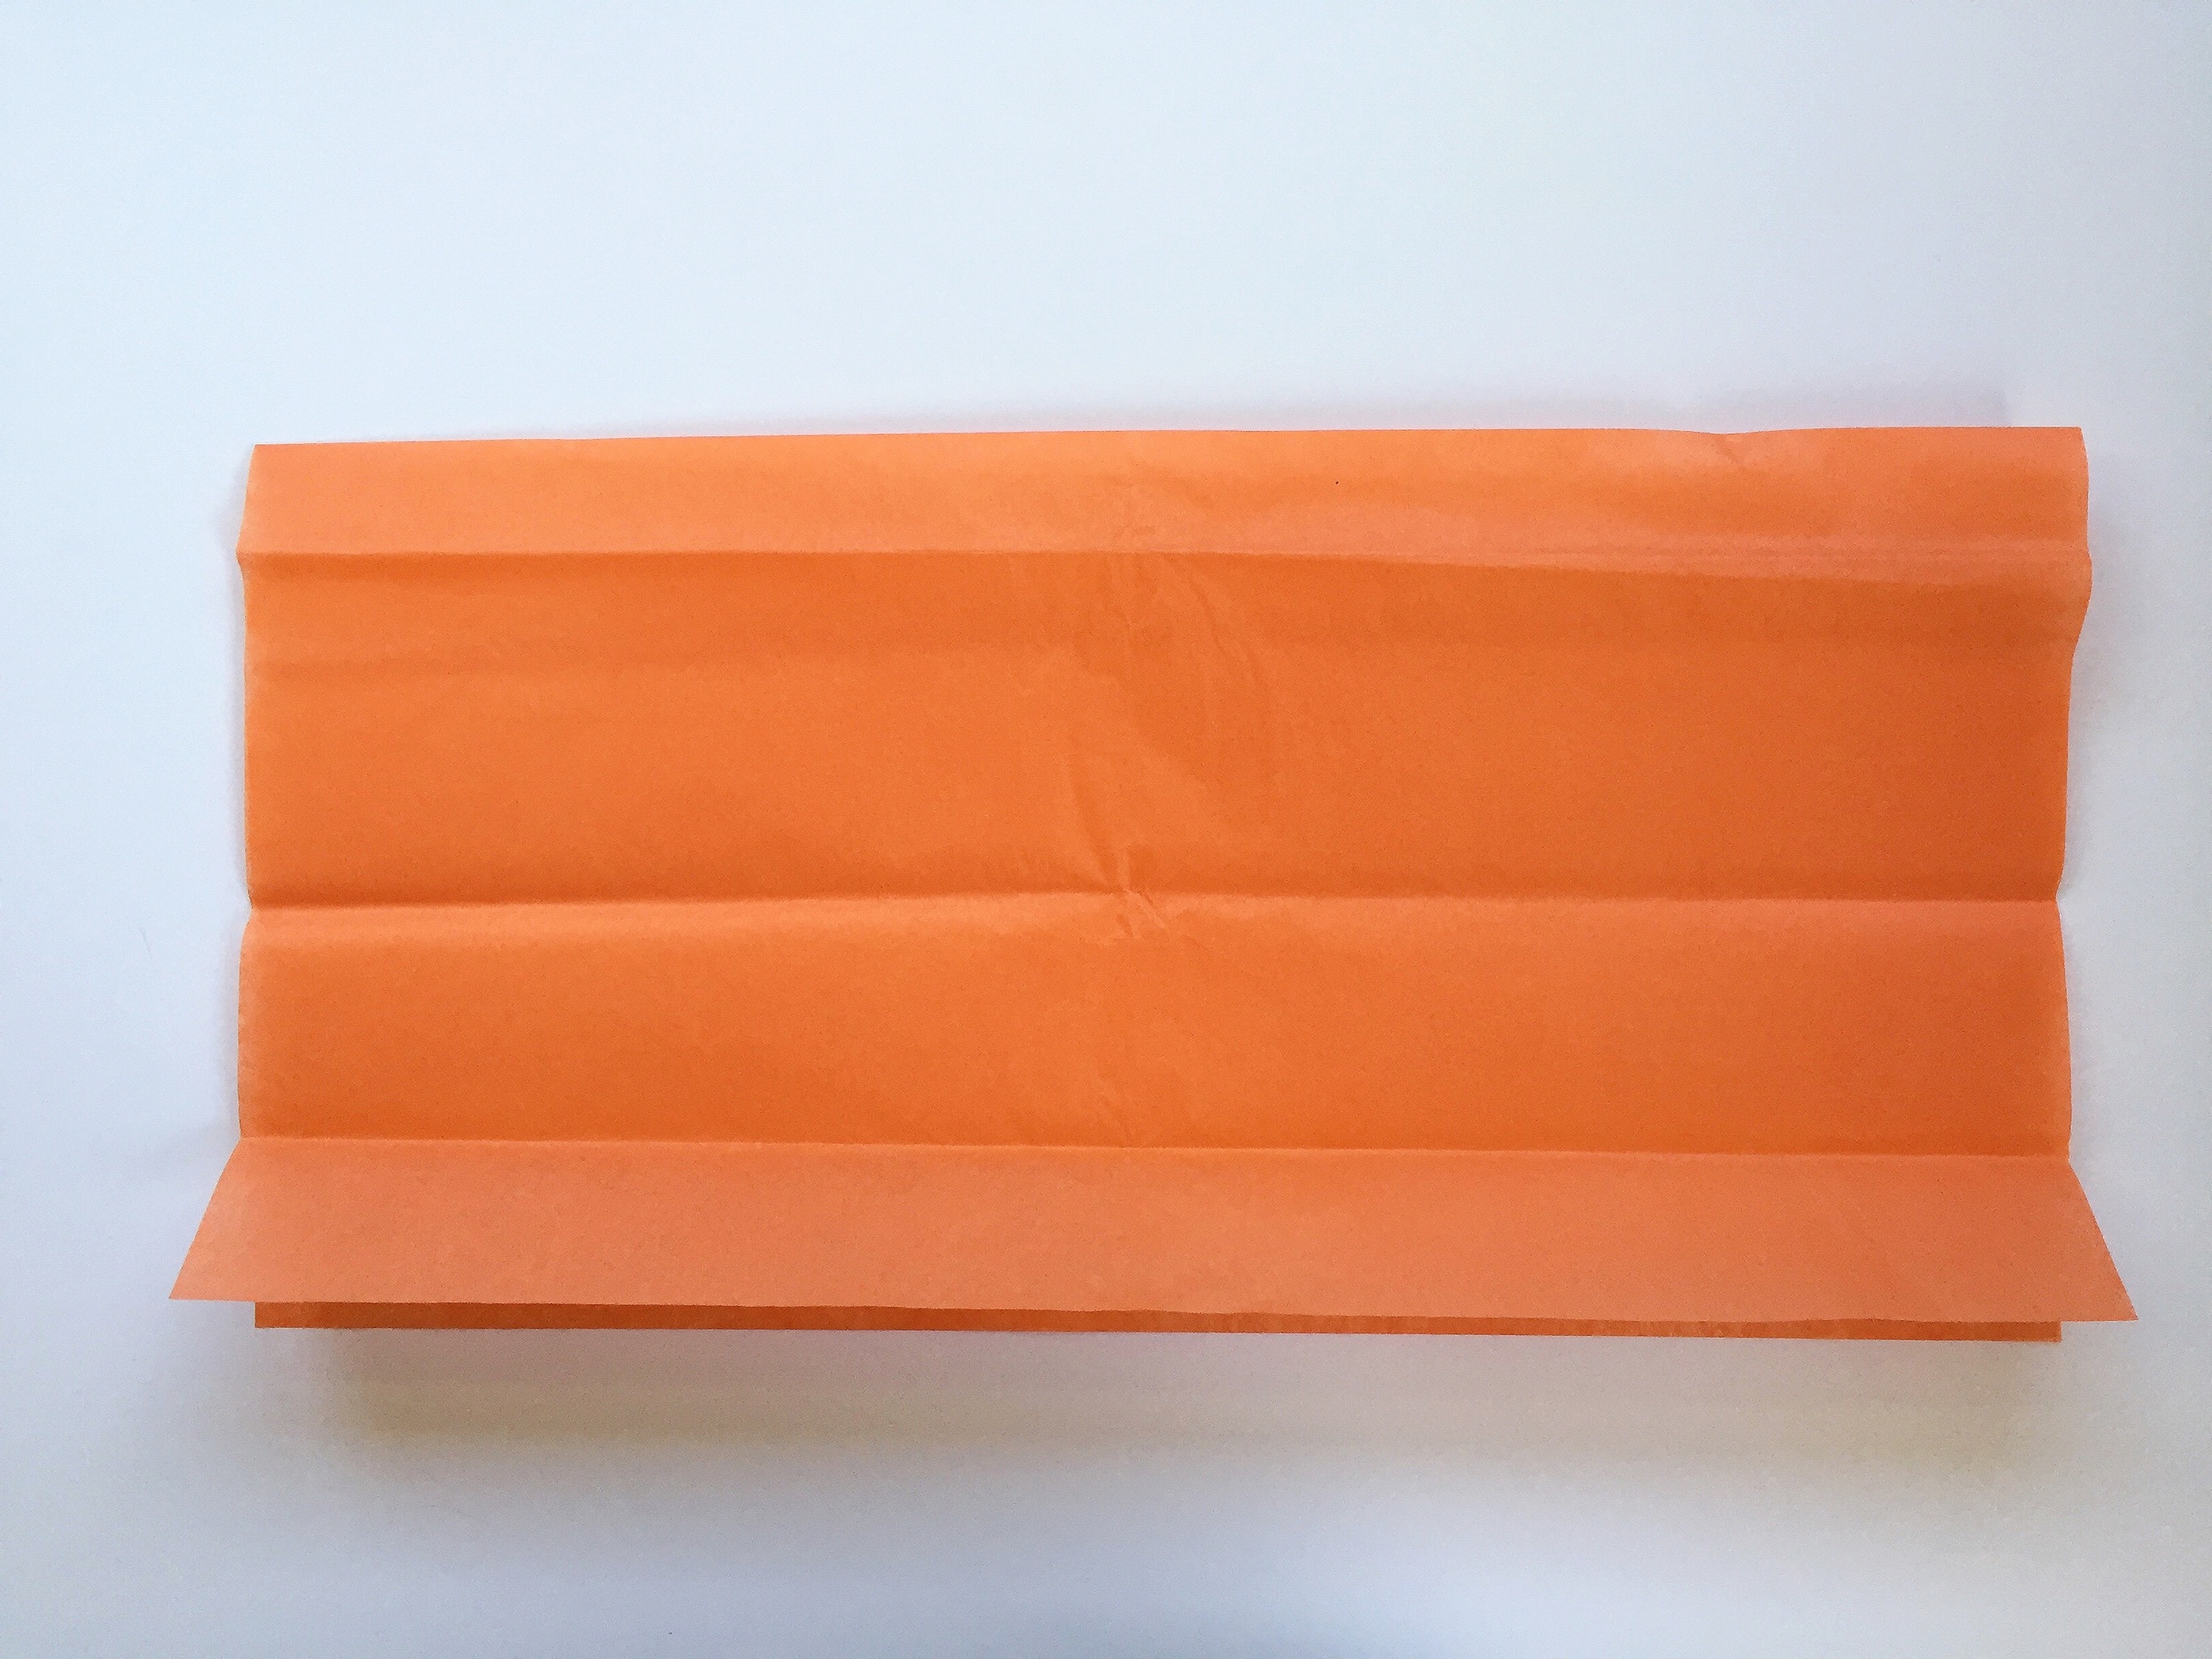
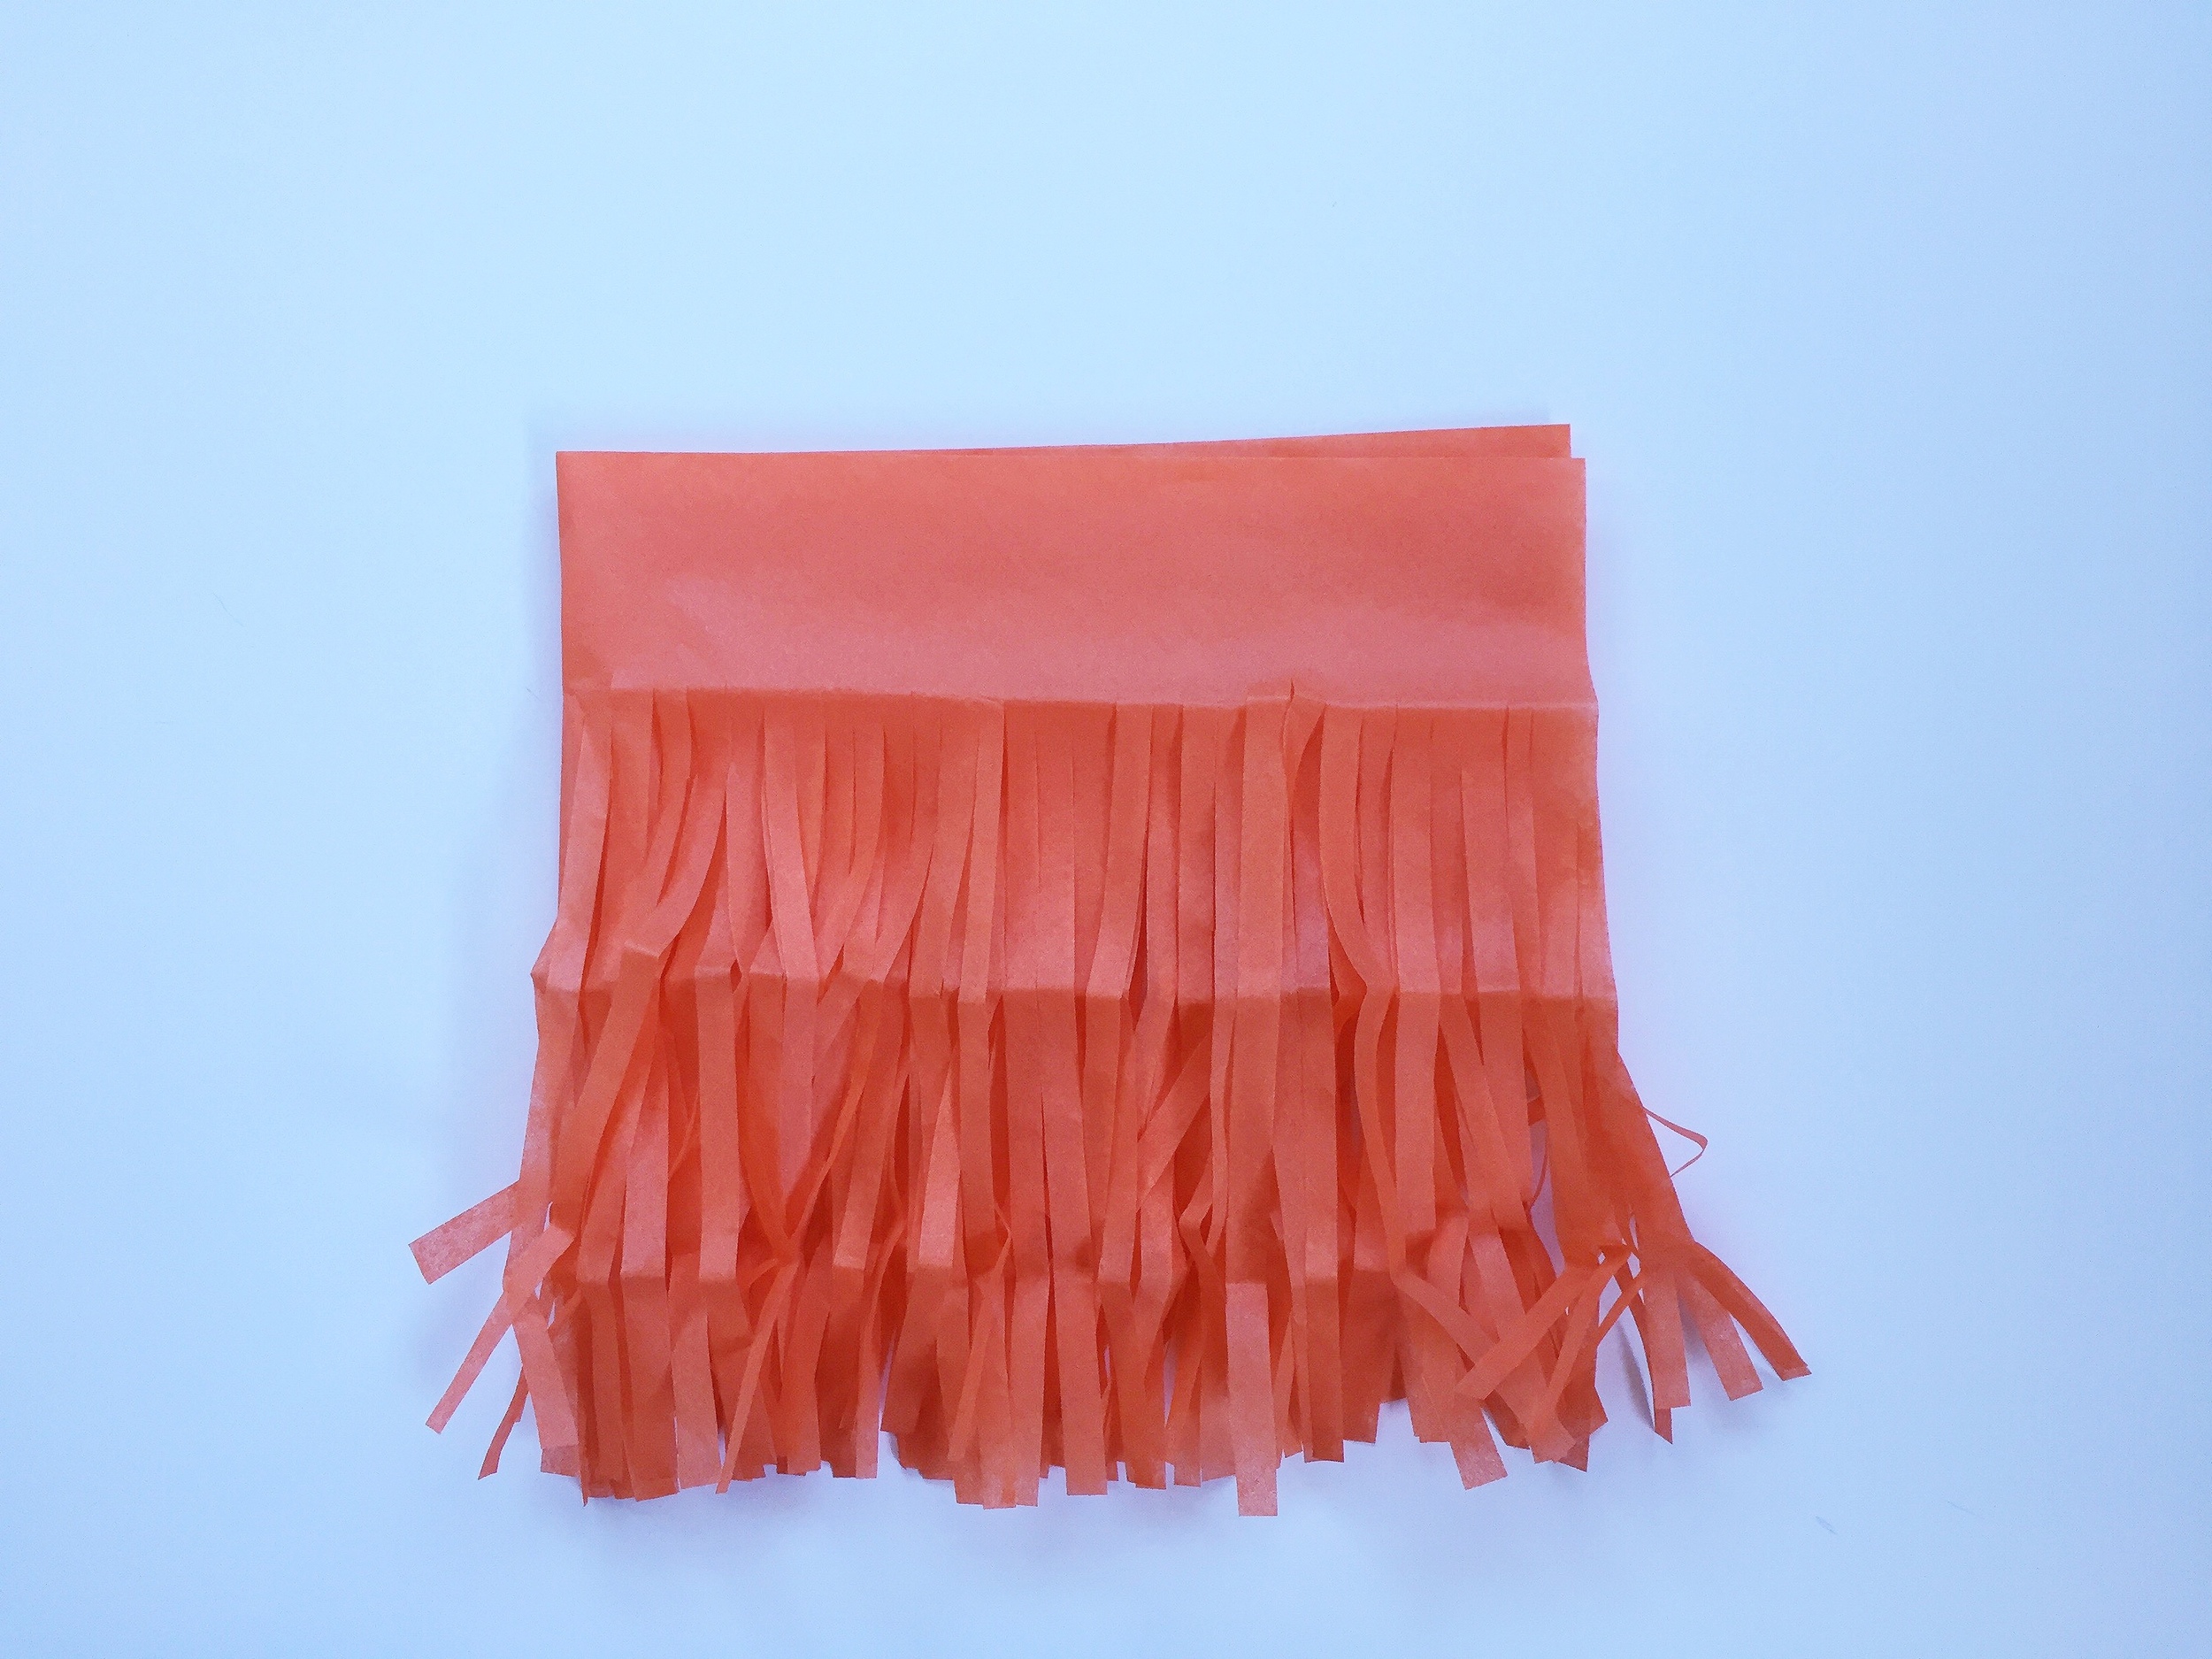
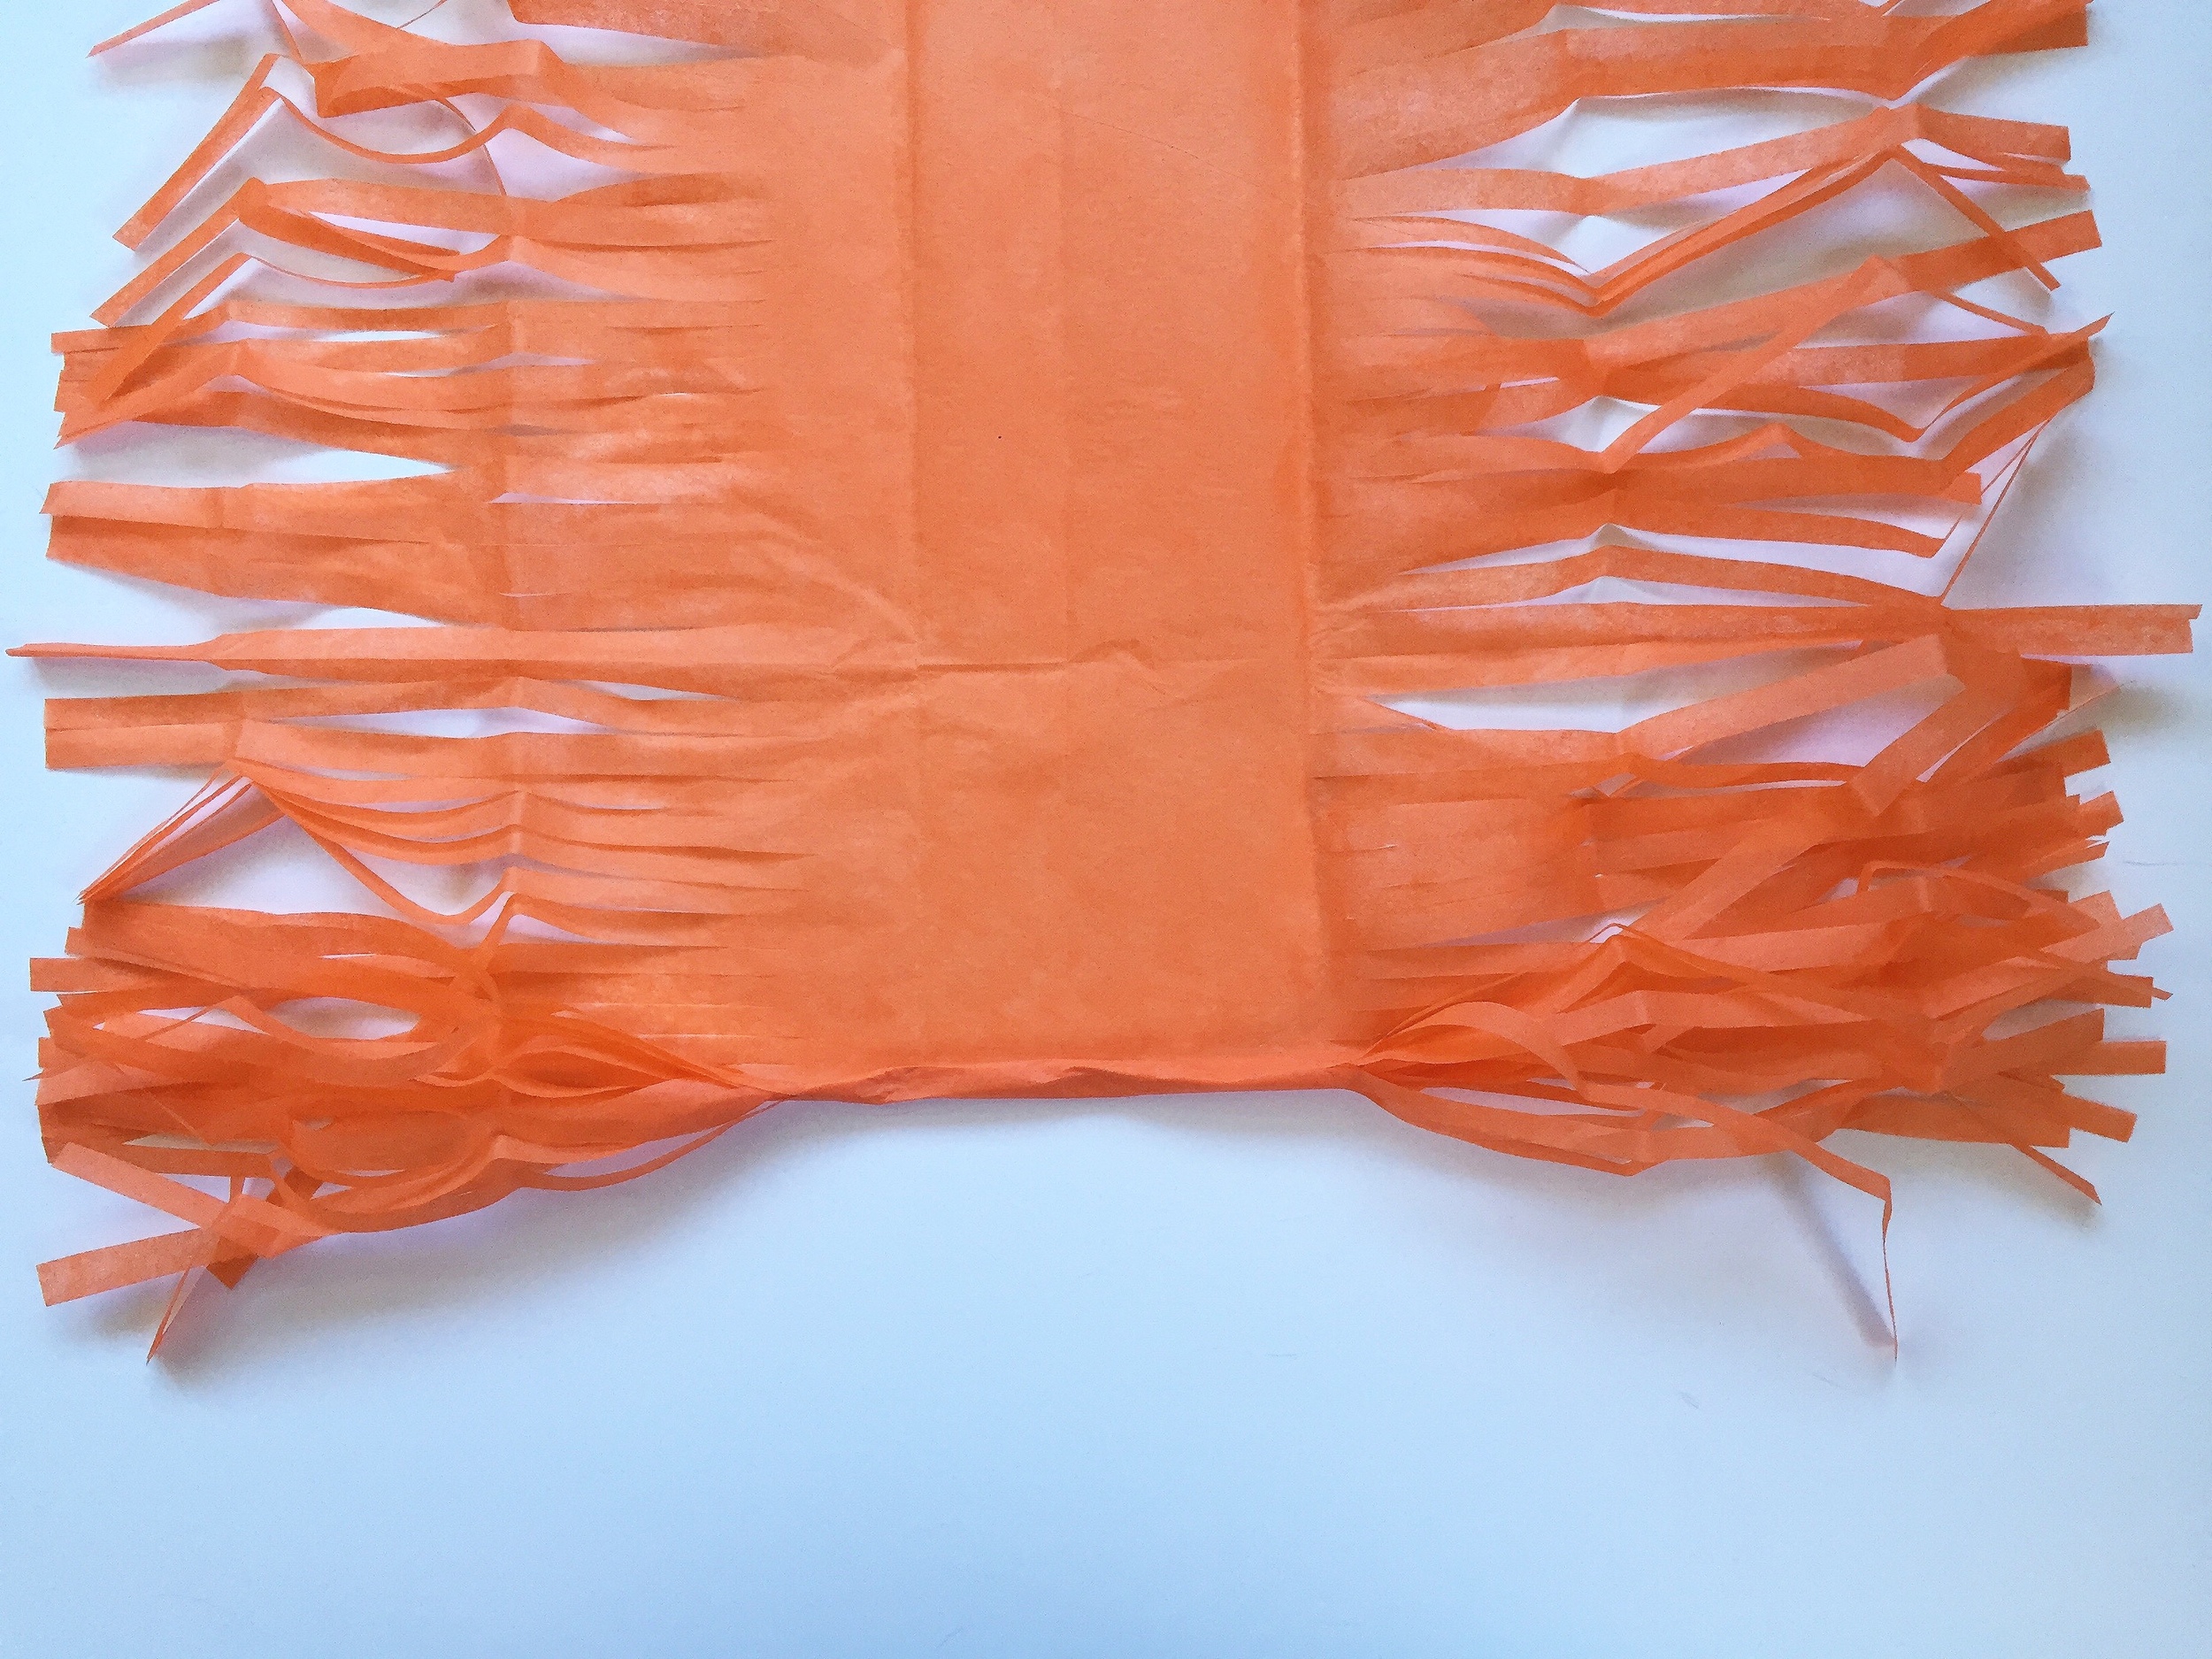
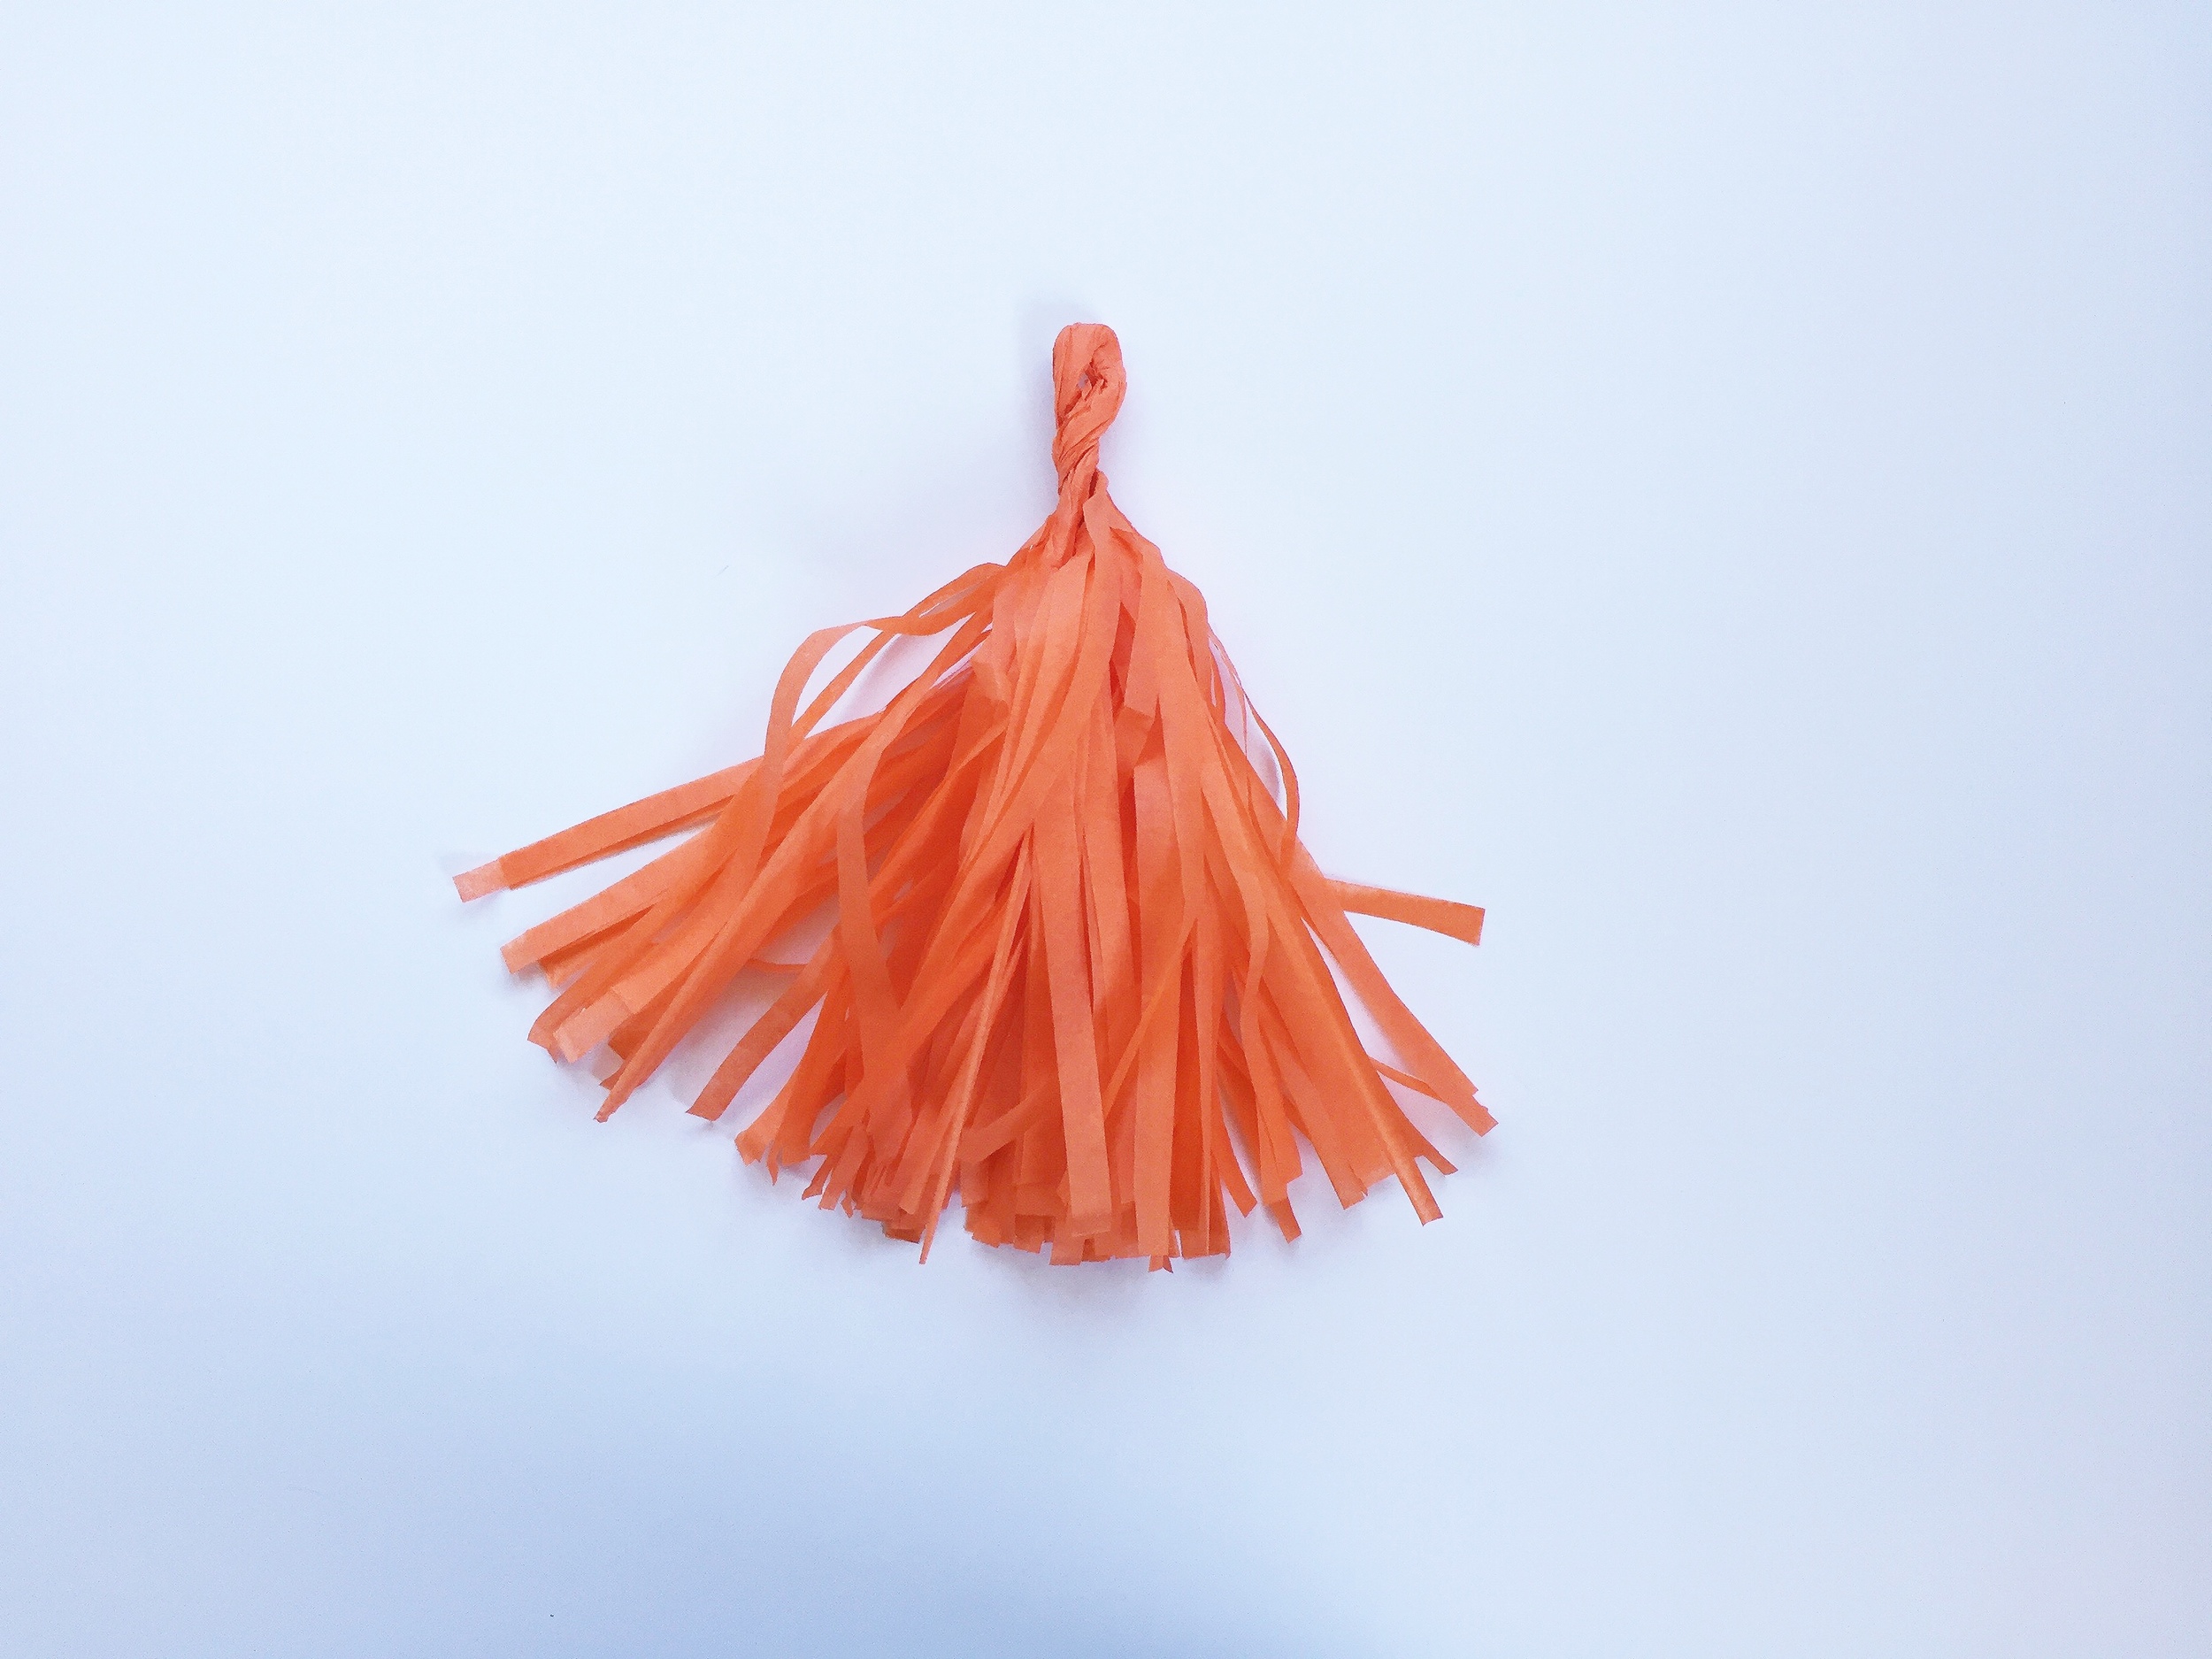
Starting with a single piece of tissue paper, open it up and fold in half width-wise for a shorter tassel or length-wise for a longer tassel. I like to do a mix of both, but I will say that width-wise ones are a little trickier since you're fighting against the natural creases from the tissue folds. If you can find tissue in bulk that doesn't have creases, even better, but the tassels will still look adorable either way. Fold it in half again so the layers are doubled up. Lay the tissue paper on the cutting mat with the folded end facing away from you. Using the ruler as a guide, begin cutting 1/4 inch strips up the tissue paper, leaving a 2 inch border at the top.

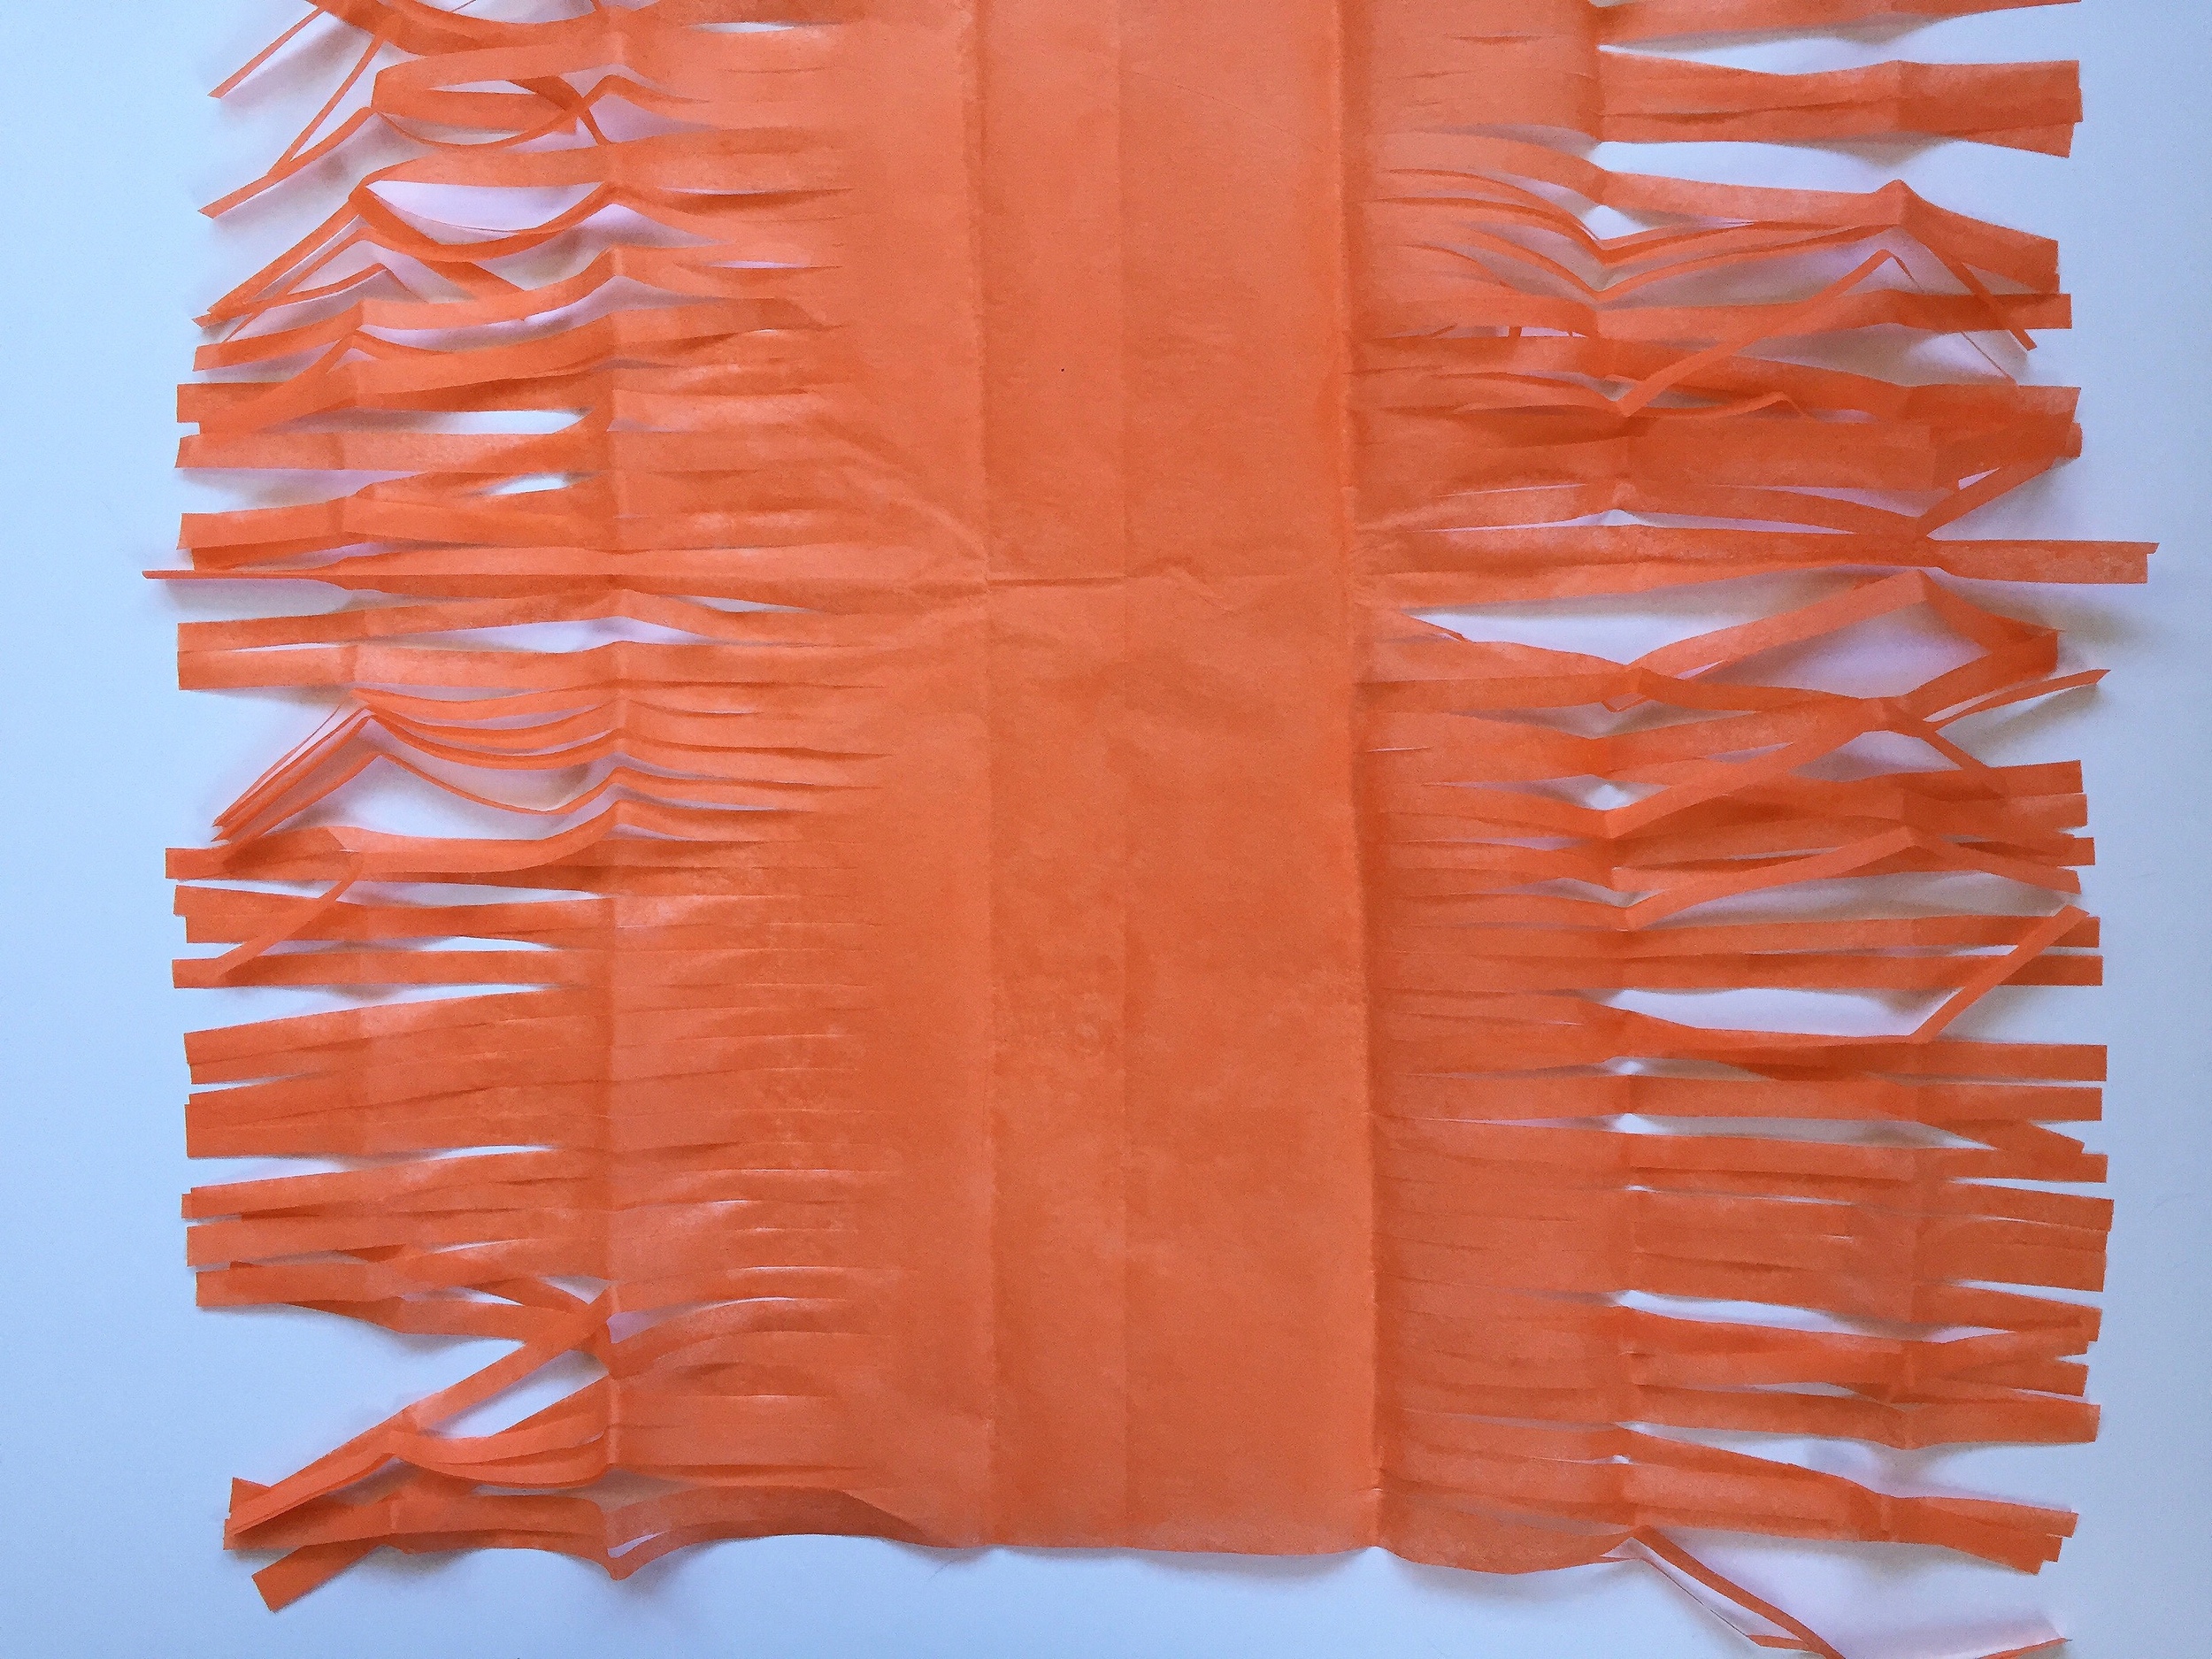
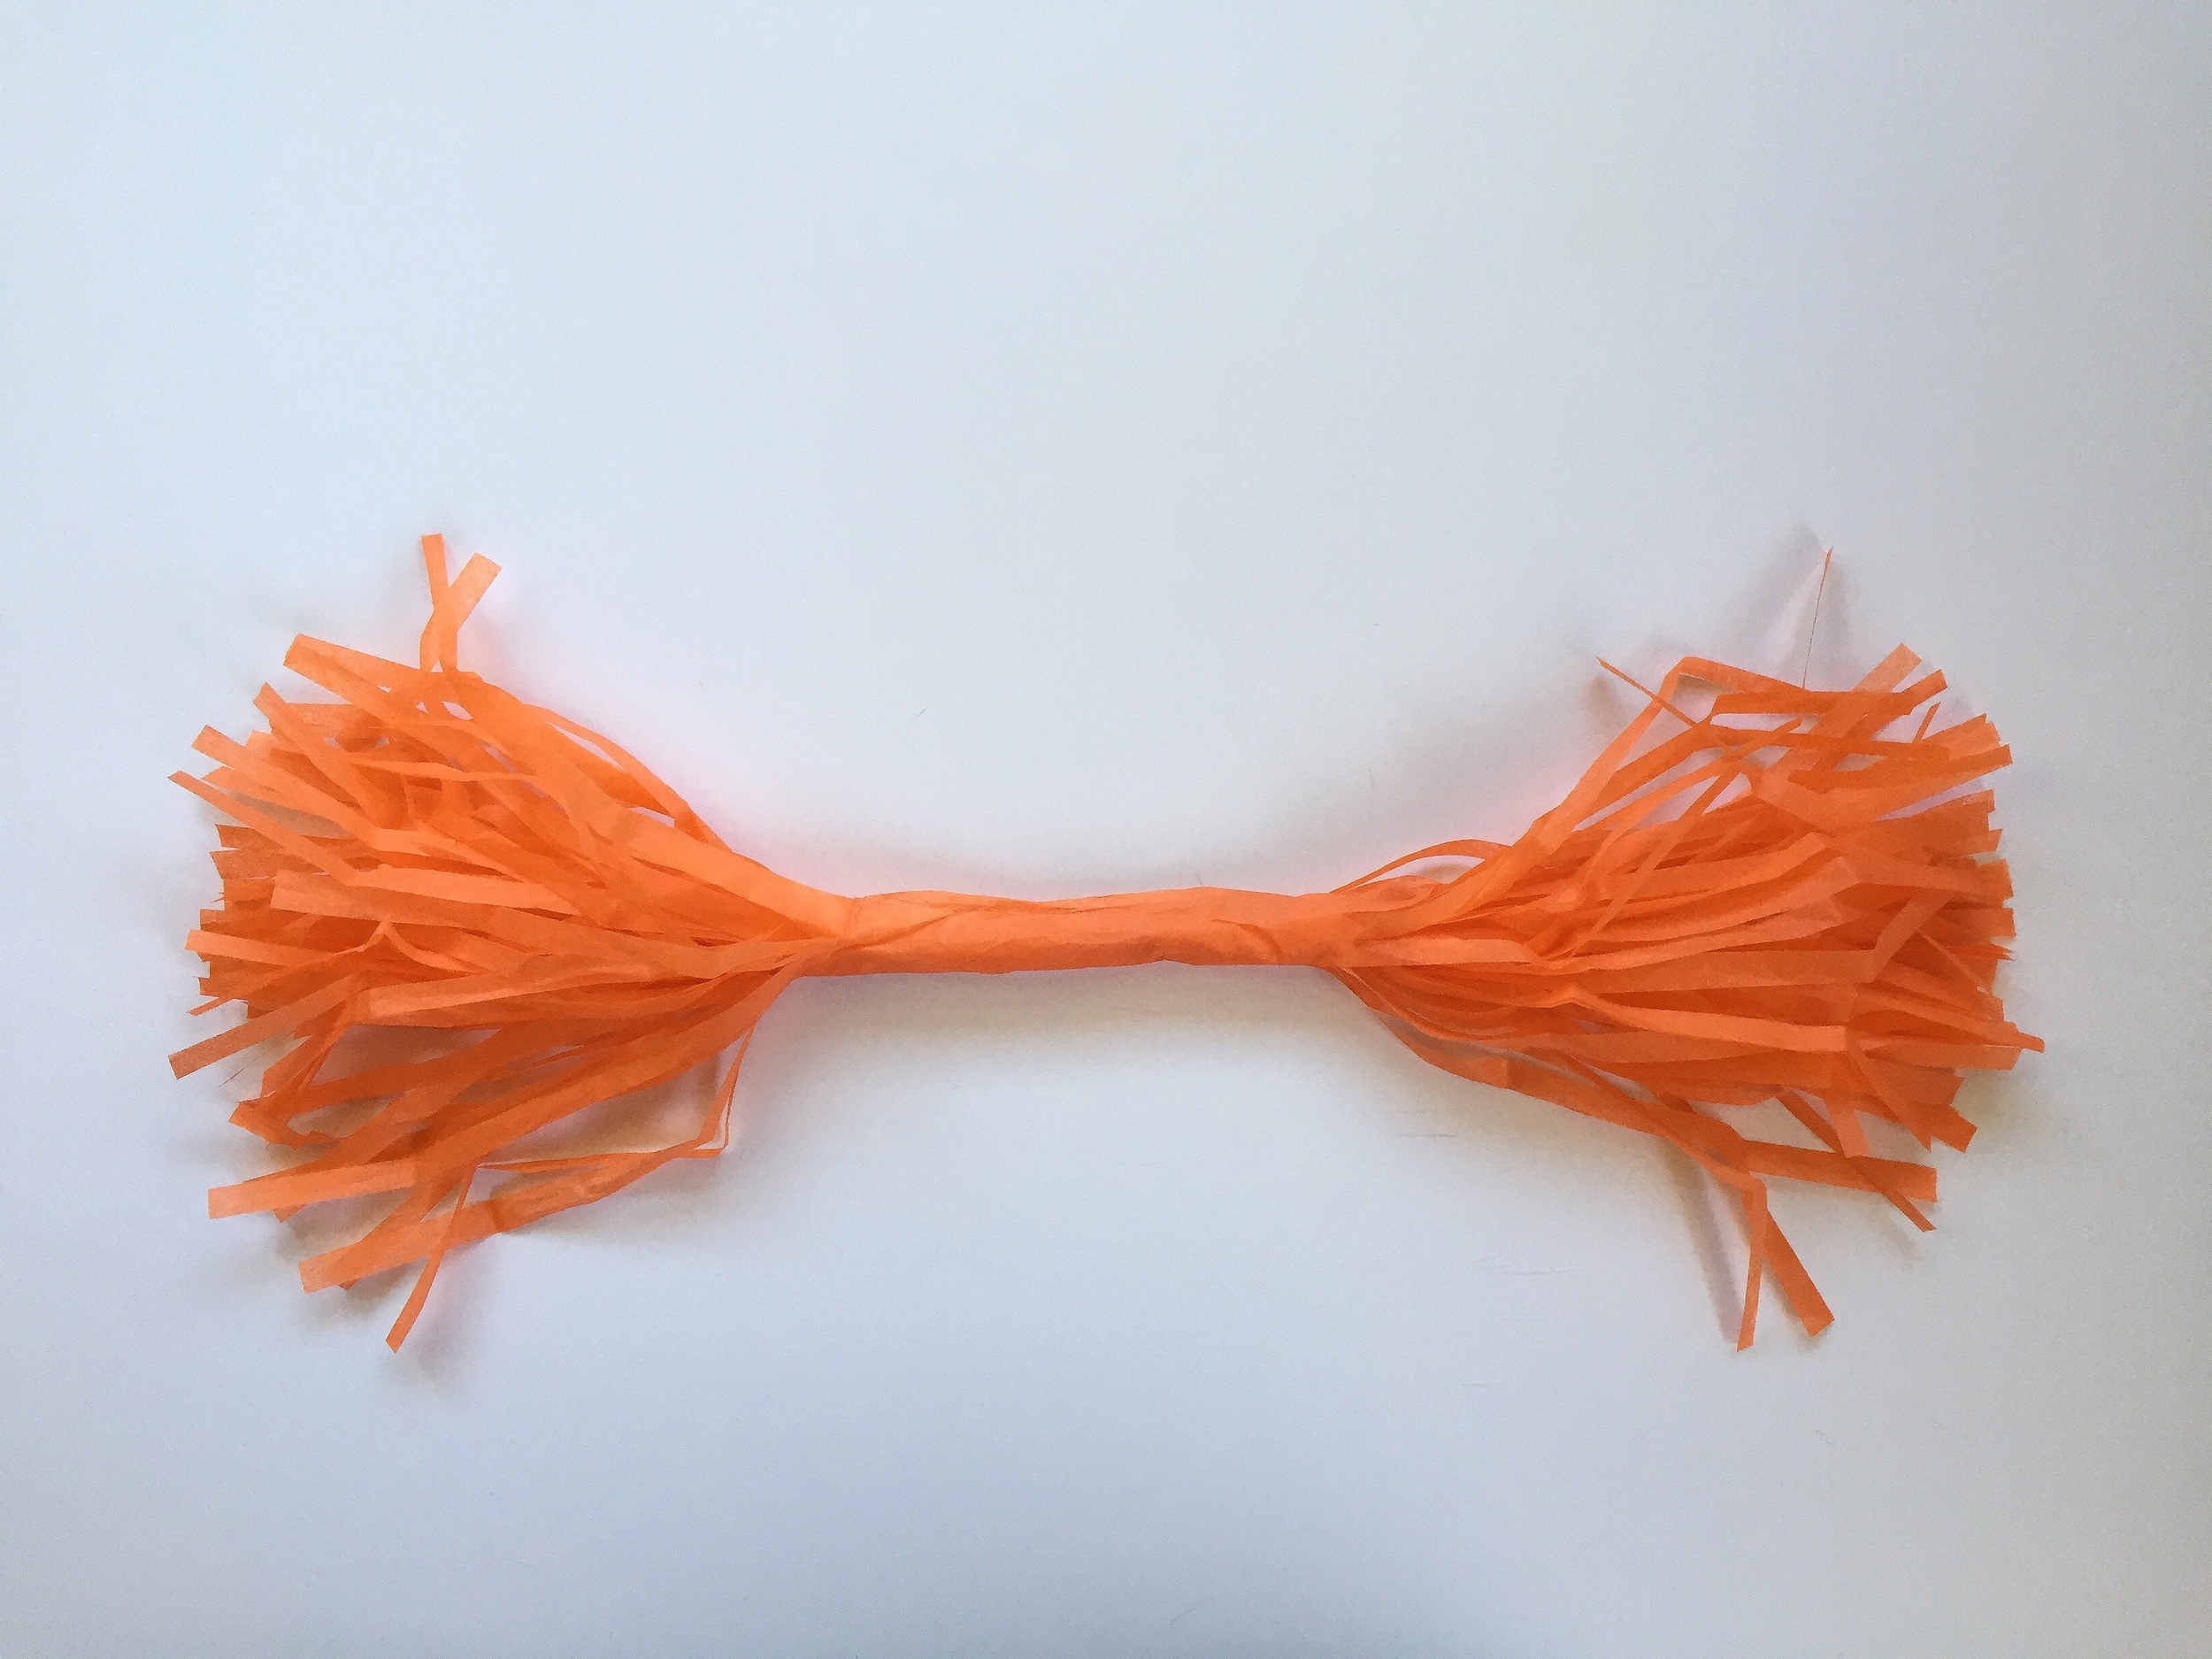
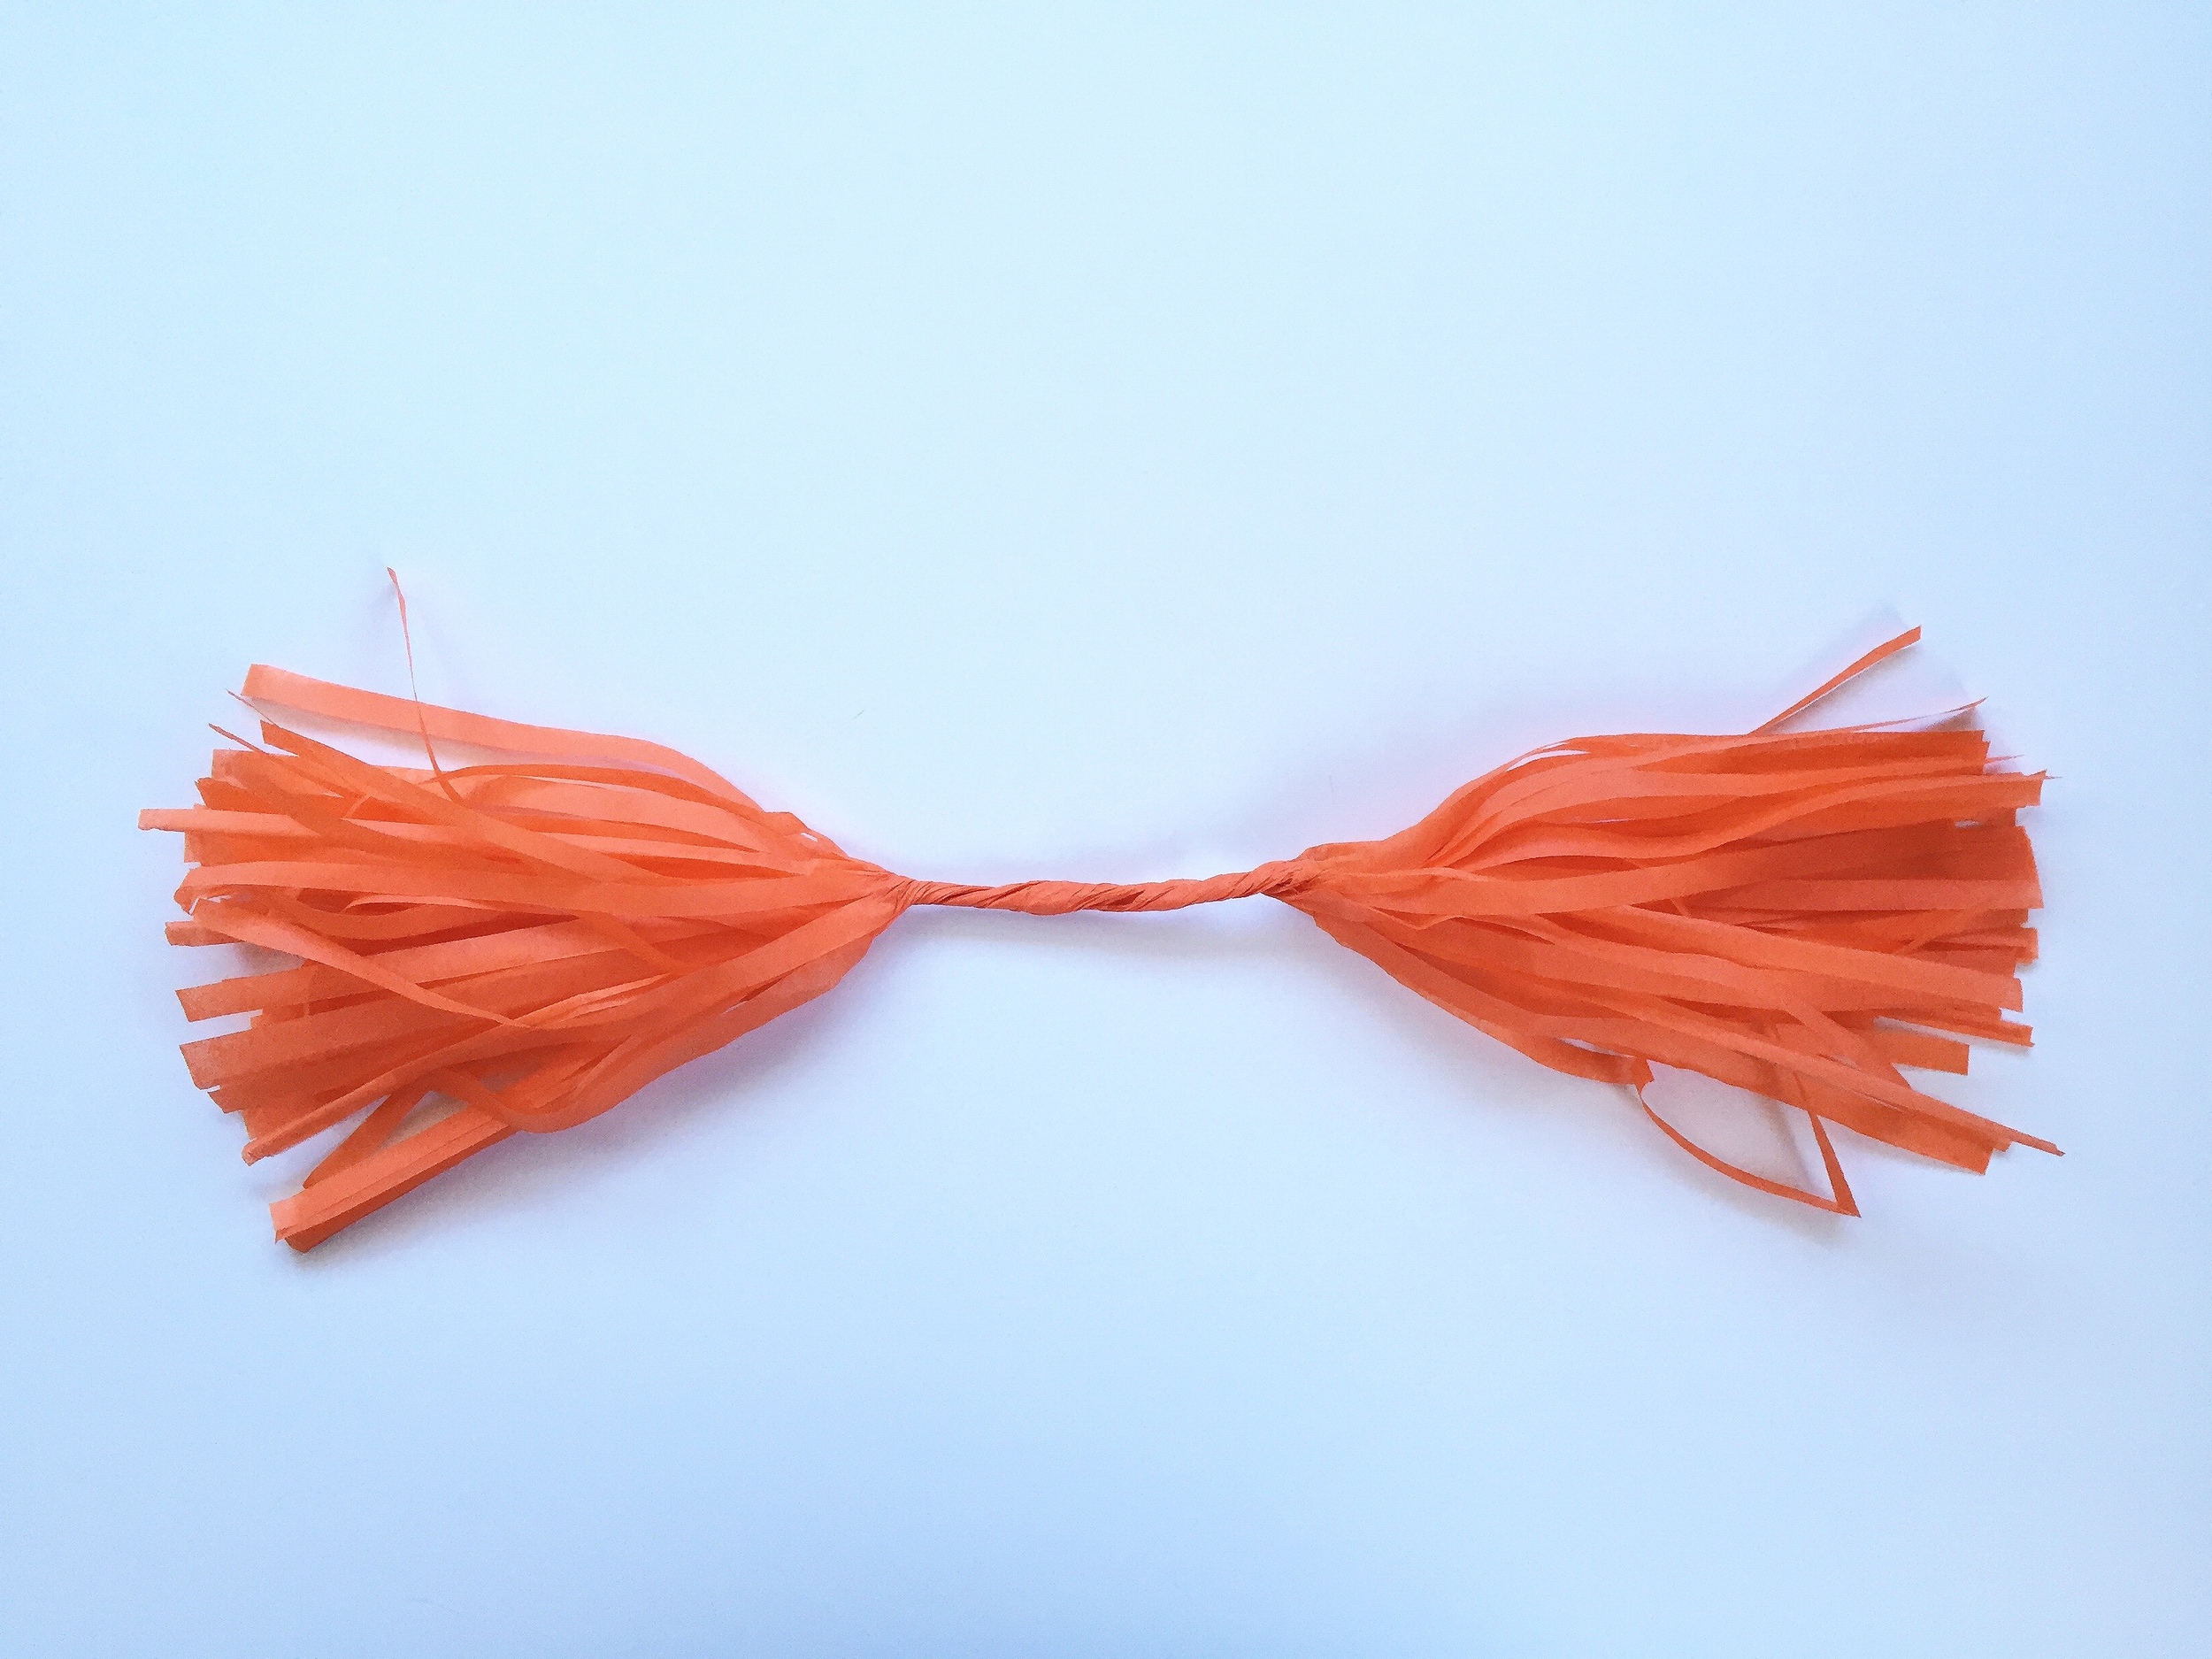
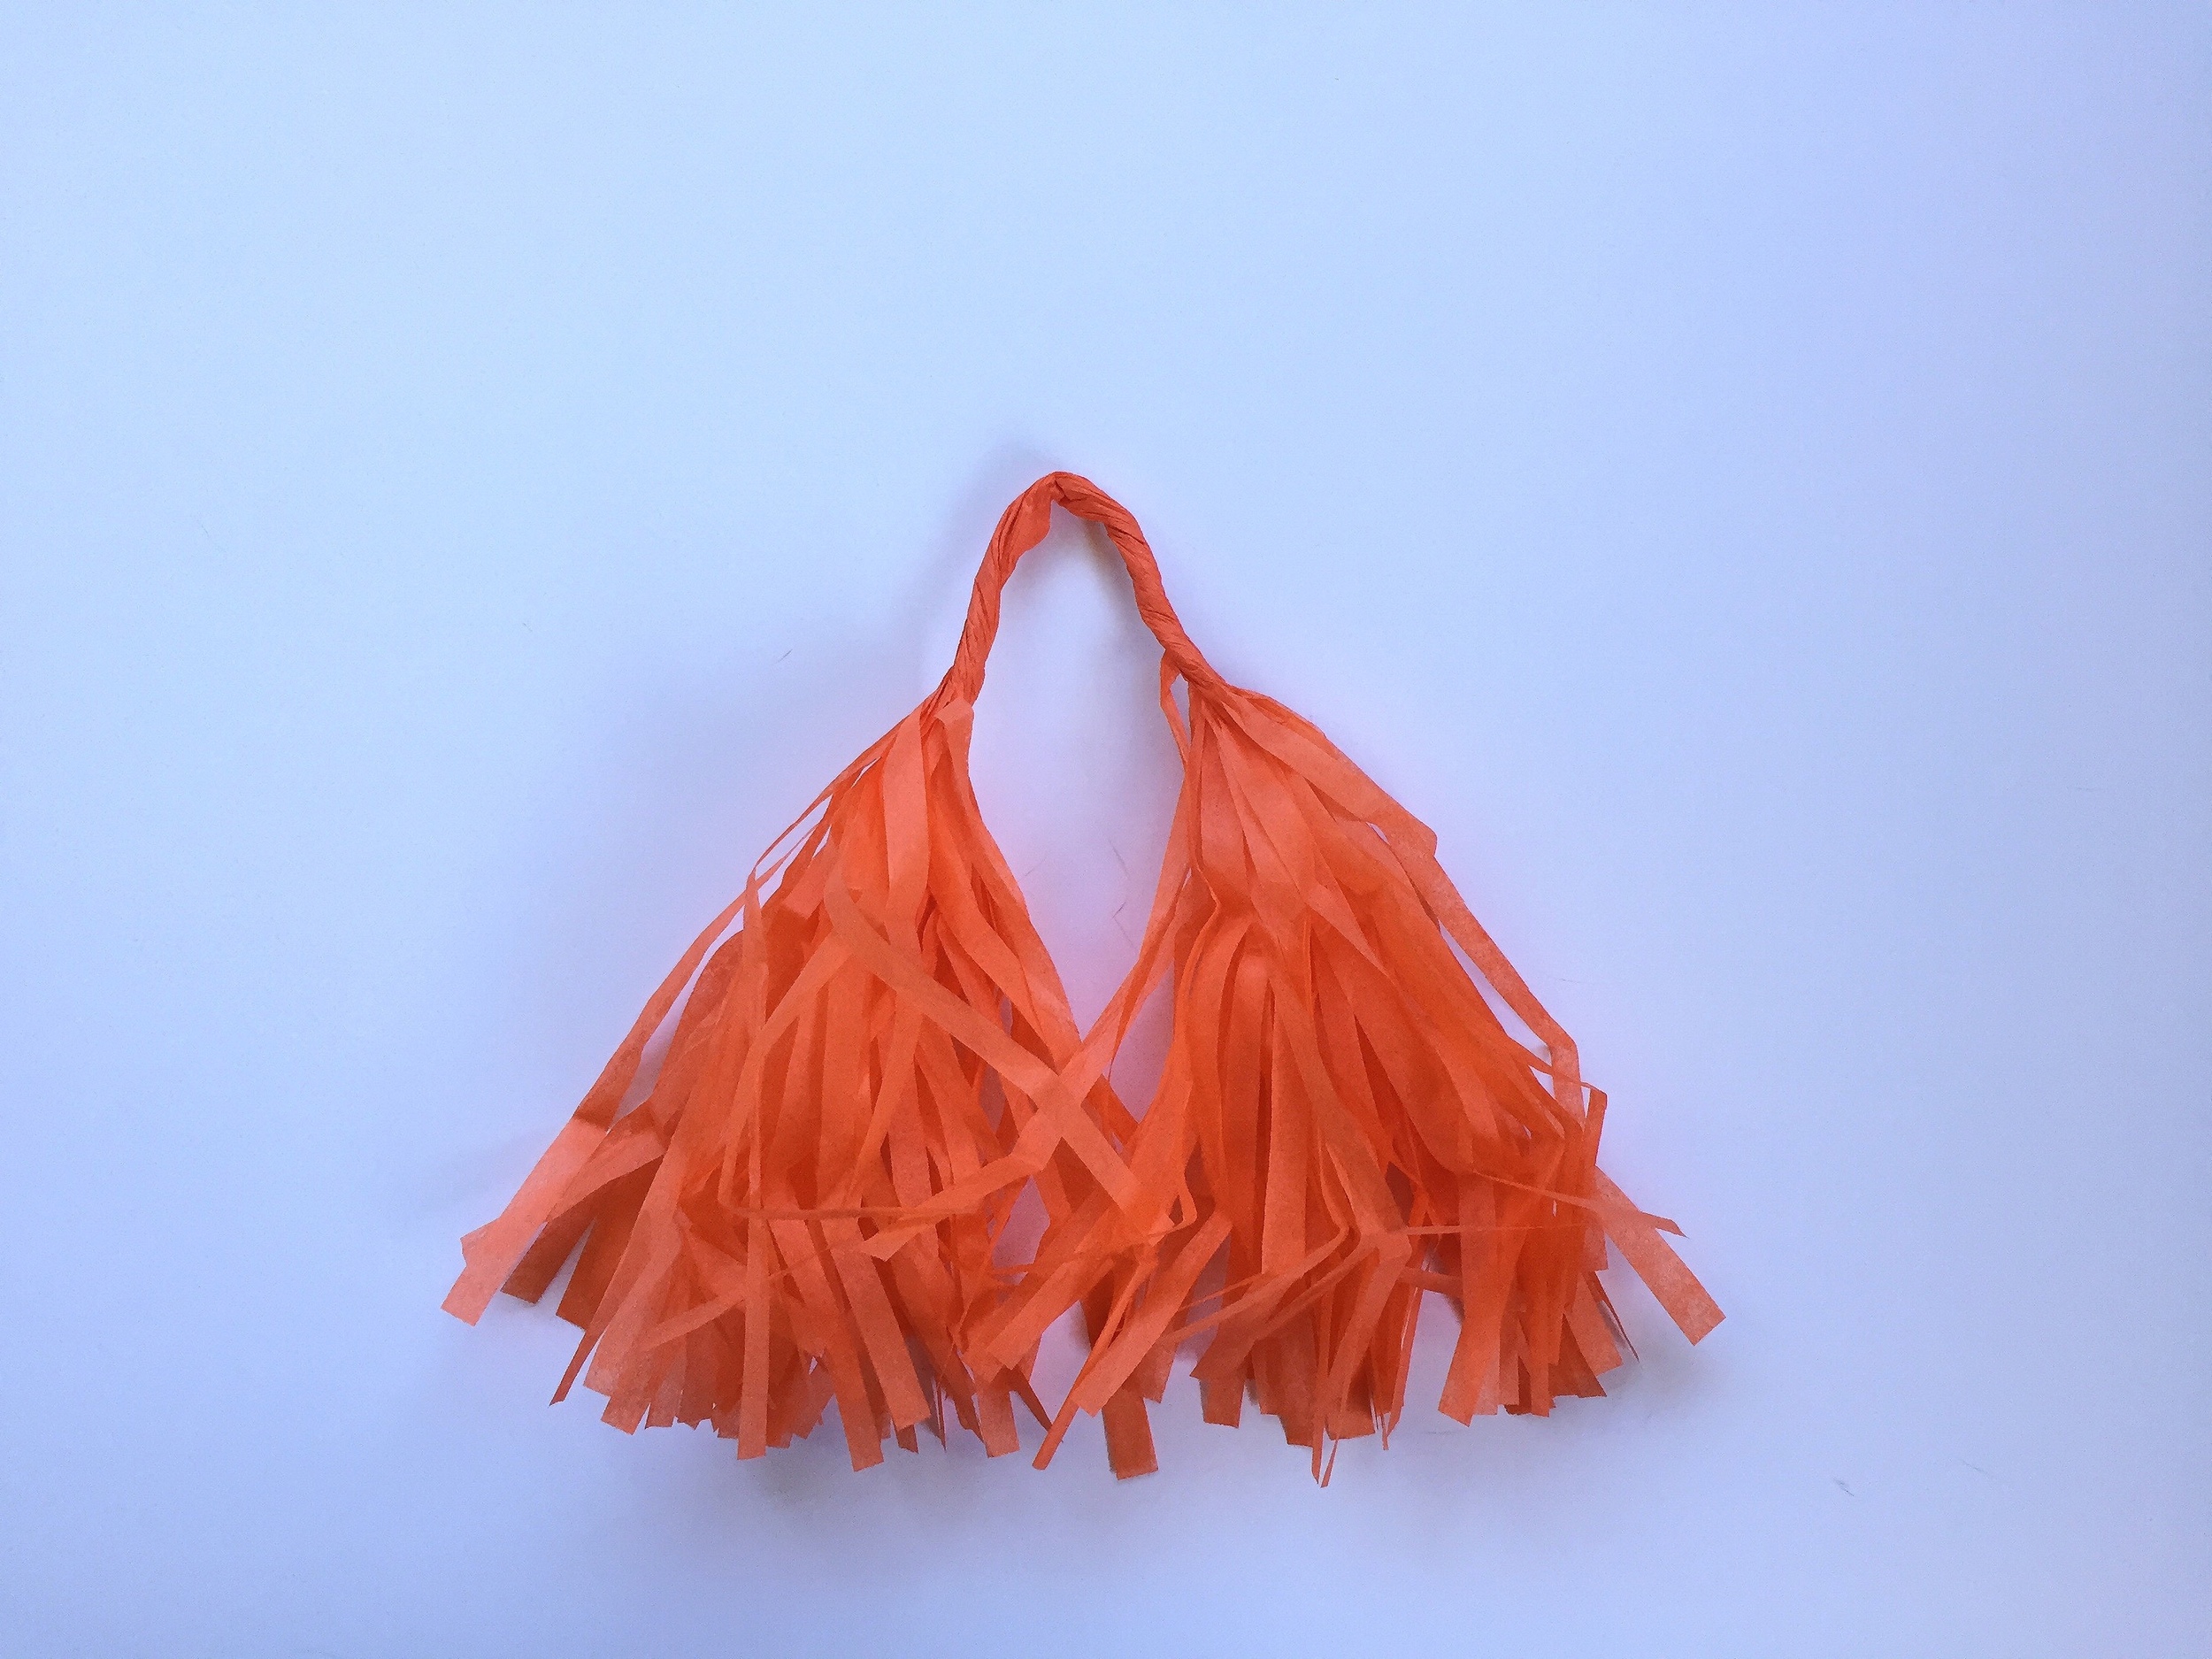
Once you've finished cutting the strips, carefully open the tissue paper up like a book. Smooth out the tissue so everything is laying flat. Begin rolling the middle section where there are no cuts, being careful not to let the tassels tangle as you go. Now fold the middle section in half and twist the middle section together until you have one uniform tassel. If using mylar, secure the bottom of the middle section right before the tassels start with a small strip of tape. Repeat with desired amount of tassels ( I would suggest at least 10, depending on what you want to use it for) and string them on the ribbon. Voila!
*Note: if you don't have a rotary cutter or don't want to buy one, you can use a pair of sharp scissors but it is a little more tedious as the roller blade allows you to make one continuous cut.


Inspiration // Eye candy

Image via Elizabeth Anne Designs

Image via Etsy

Image via 100 Layer Cake

Image via Fawn Over Baby

Image via Lonny

Image via My Old Country House